In my previous post, we used PIM to enable an Intune Administrator to activate their role only when needed, rather than having standing Intune Administrator Permissions at all times. That’s great, but this level of access shouldn’t be used every day.
Let’s say we have different IT teams in different cities that are responsible for supporting devices in their respective offices. Let’s say a “Toronto” office and a “Winnipeg” office. We want these teams to have the access they need, while practicing least-privilege.
In this post, we are going to do the following:
- Tag the Devices: Assign a unique extensionAttribute to devices based on their intended location.
- Create the Dynamic Groups: Create one Dynamic Groups for Toronto devices and another for Winnipeg devices.
- Create and Configure the PIM-Enabled Groups: Set up role-assignable groups to manage “Just-in-Time” access for the teams.
- Configure the Scoped Role Assignment: Link the technicians to the Toronto and Winnipeg device groups using two different Intune roles and leveraging Scope Tags.
- Test the Workflow: Verify that the technicians are unable to see any devices in the Intune portal until after elevating their permissions with PIM. After elevating with PIM, test that they can perform actions based on their roles.
Be aware that there are both Entra Roles and Intune Roles. Intune Administrator is an Entra Role. In this post we are going to explore setting up Intune Roles.
1. Tag the Devices
First, what are extension attributes? Extension attributes in Microsoft Entra ID are custom, string-based data fields that can be used to store additional information on objects like users or devices. There are 15 extension attributes that can be used (extensionAttribute1 through extensionAttribute15). They extend the default schema and can be used to support specific business needs. For example, regional\location information (as we will see today) and are often used for dynamic group membership and policy targeting. While in this post we are using Entra-only devices, if you are using on-premise AD, they can be synced to Entra ID.
As a method to set Extension Attributes using the GUI doesn’t currently exist, Graph API can be used. Note the required permissions and where the device name is set:
# 1. Connect to Microsoft Graph.
Connect-MgGraph -Scopes "Device.ReadWrite.All"

# 2. Identify the device you want to set the attribute on.
$deviceName = "DEMOPC-1234"
$device = Get-MgDevice -Filter "DisplayName eq '$deviceName'"

# 3. Set ExtensionAttribute1.
$params = @{
    extensionAttributes = @{
        extensionAttribute1 = "Toronto"
    }
}

Update-MgDevice -DeviceId $device.Id -BodyParameter $params
You can then view the attributes in the Entra portal under Manage > Devices > All Devices and then clicking on the respective device.


2. Create the Dynamic Groups
Create dynamic groups similar to the following, one for Toronto and one for Winnipeg:
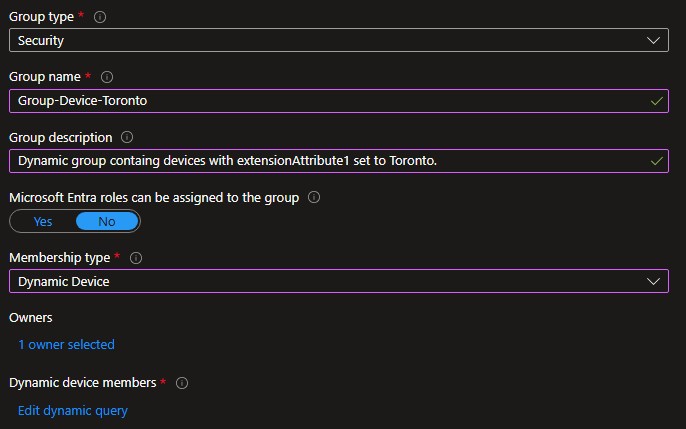
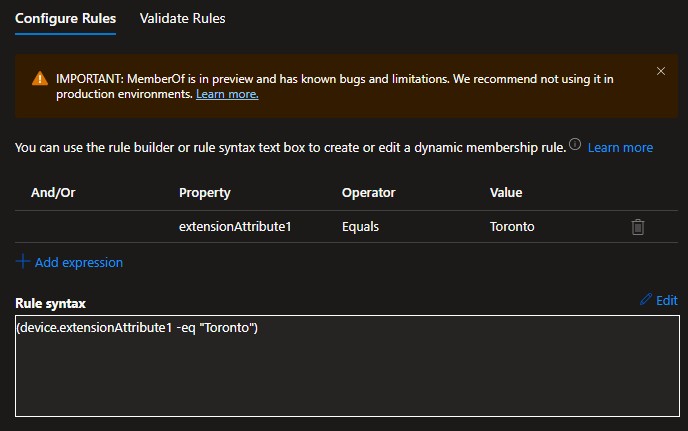
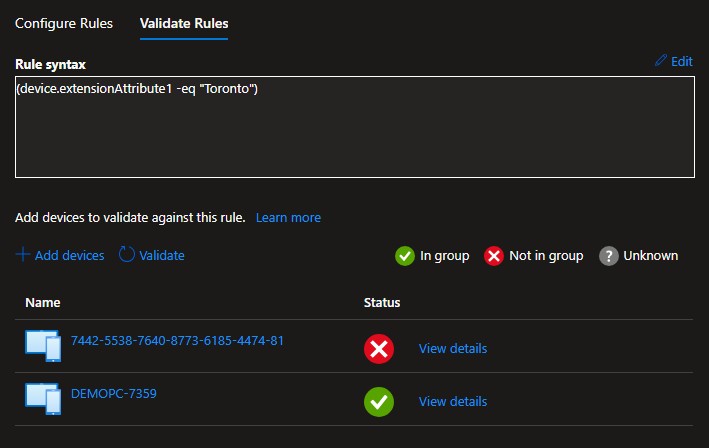
Here is an example of the Toronto query and validating the membership of the group based on the extensionAttribute1 set for each device earlier. Don’t mind the device with the serial-number name – it had just been imported into Autopilot and was being deployed.
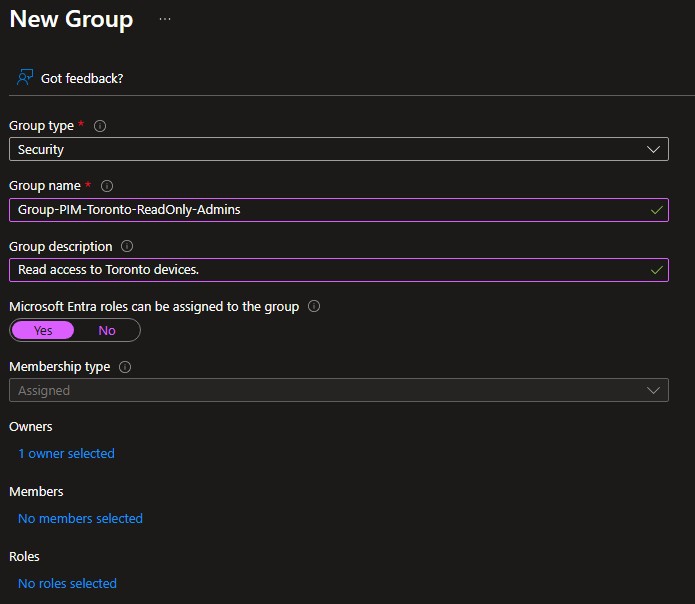
3. Create and Configure the PIM Enabled Groups
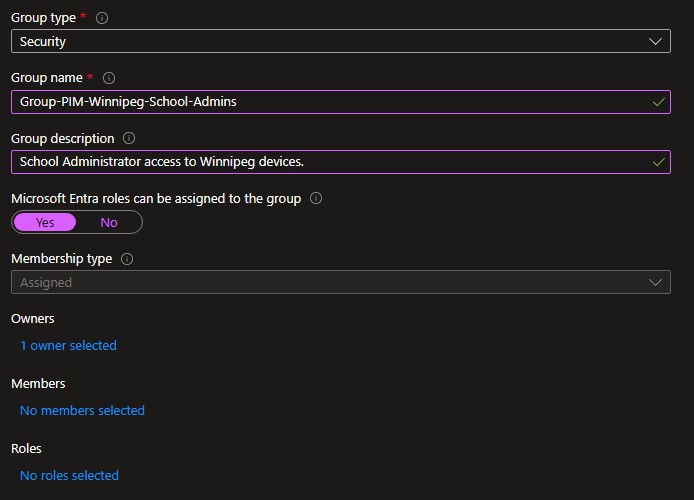
Create two groups: one for Toronto Read Only access and another for Winnipeg School Administrator access.
Be sure to enable “Microsoft Entra roles can be assigned to the group”. Although right now we are going to link these groups to Intune roles, we may link them to Entra roles in the future.
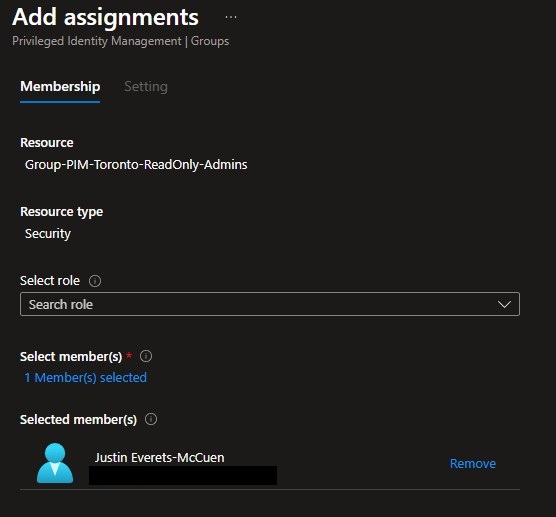
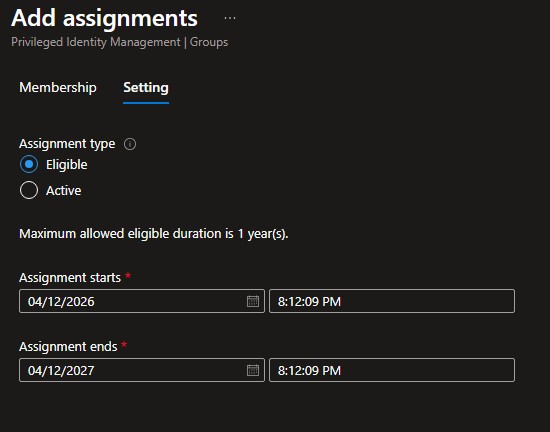
Add the groups to PIM (Discover) and setup the users as eligible members. Do this for both groups:
4. Configure the Scoped Role Assignment
First we will create “Toronto” and “Winnipeg” Scope Tags. a Scope Tag is essentially a label you that can be applied to objects in Intune (like devices, apps, or policies) to control who is allowed to see and manage them. For better or for worse, Intune likes to default open when it comes to scope tags. i.e. No Scope tag or “Default” lets users see everything.
In Intune, navigate to Tenant Administration > Roles > Scope Tags:

Provide a name and description for the scope tag:

Assign it to the corresponding group:

Review and create the Scope Tag. It will now be assigned to all objects in that group automatically. Repeat for the Winnipeg group.

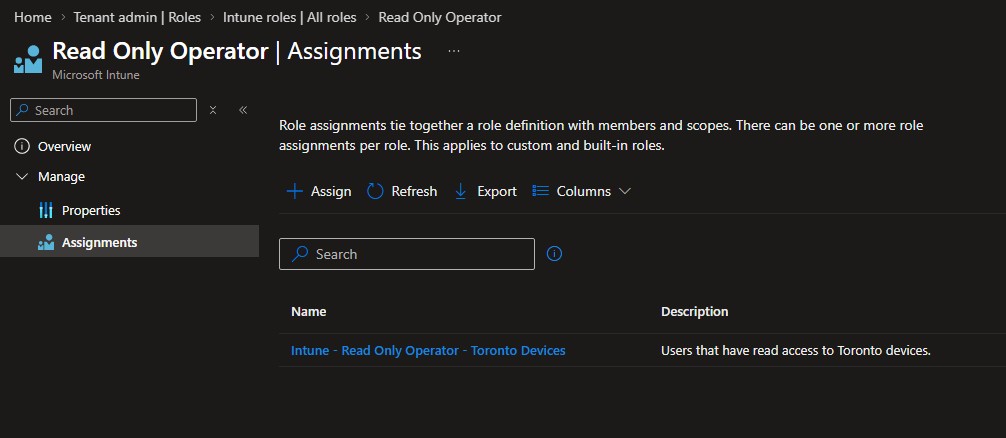
Next we will create the Role Assignment. Navigate to Tenant Administration > Roles:
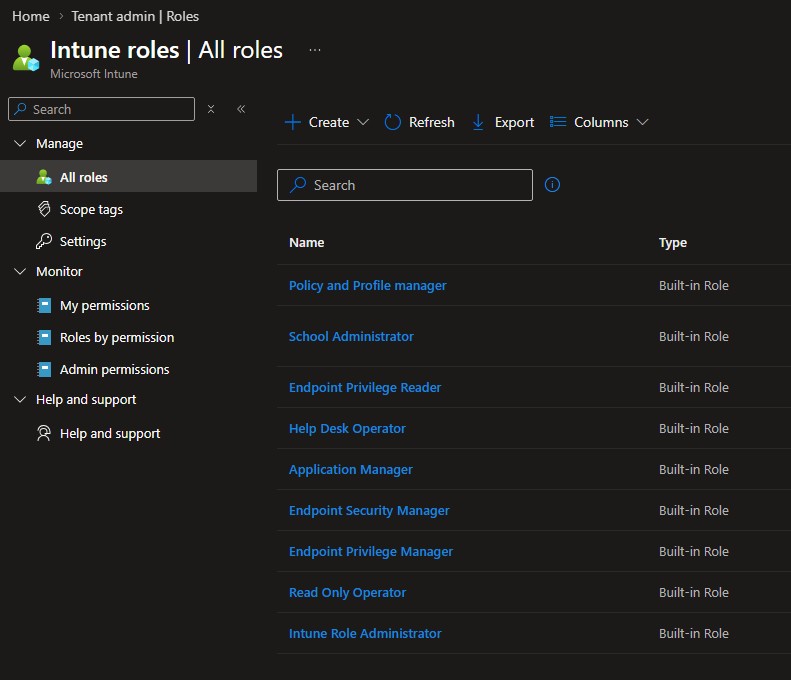
Click on one of the roles such as Read Only Operator, then click Assignments. The screenshot shows the assignment after it has been created.
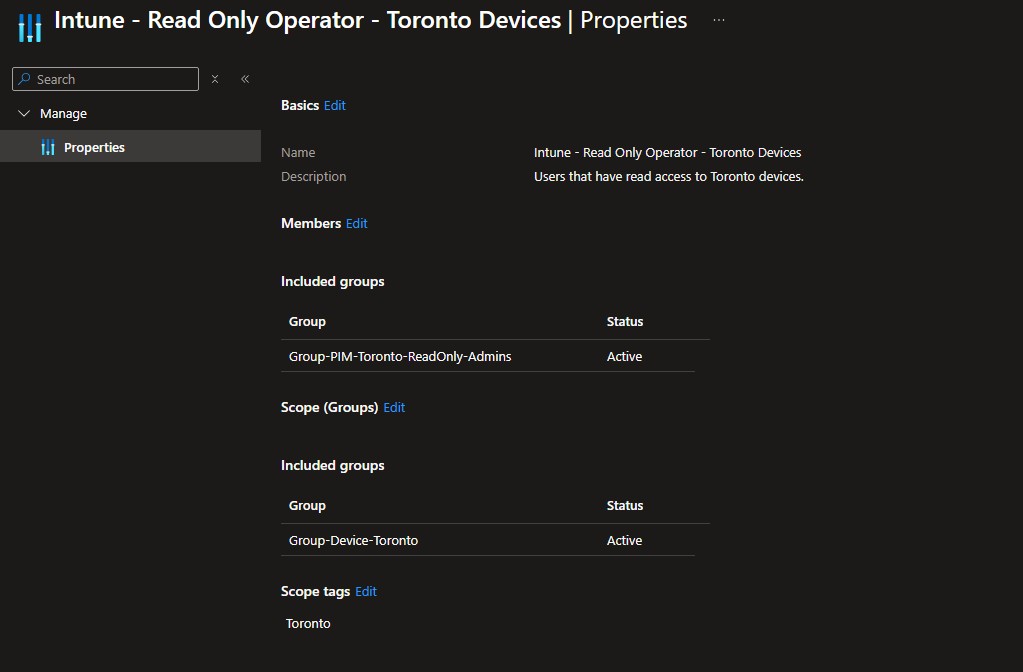
Click Assign. Use the example below to help configure the assignment. Ensure a proper name and description, add the appropriate PIM-enabled user group, scope to the correct device group, and add the corresponding Scope Tag.
5. Test the Workflow
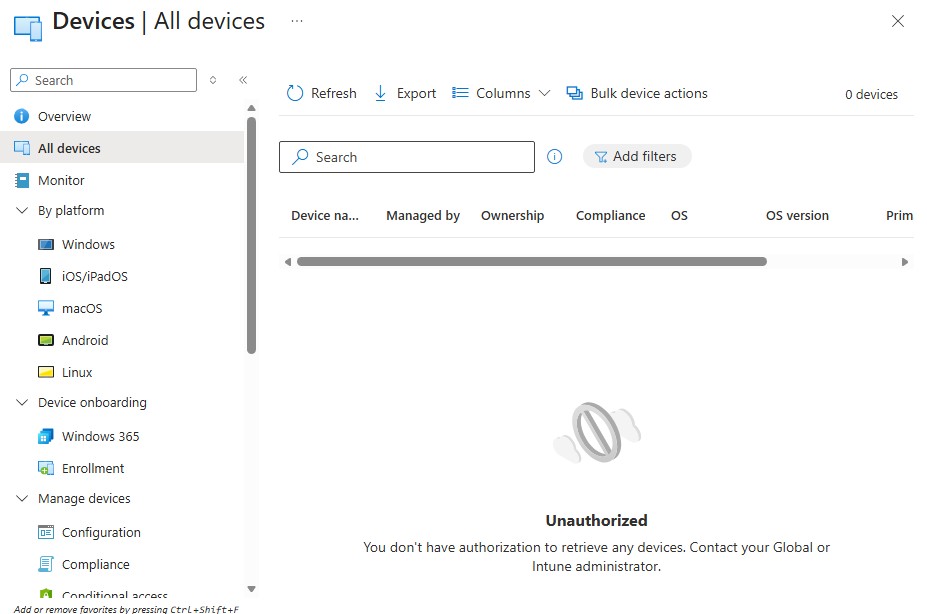
Signing in with an “Intune Administrator” that does not yet have any roles (or dark mode) activated…
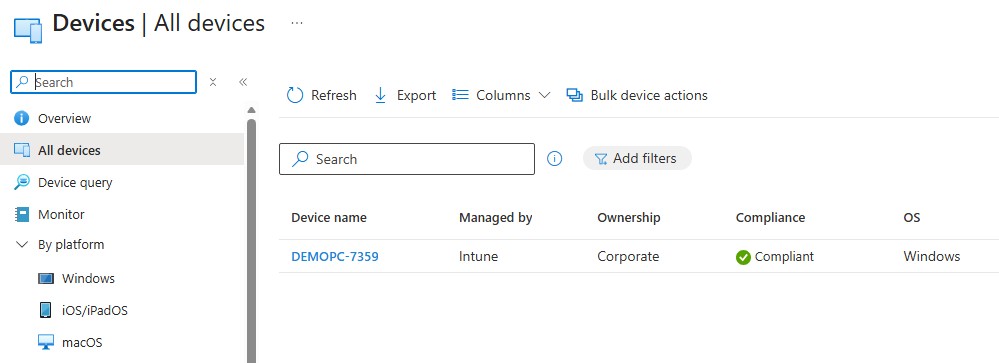
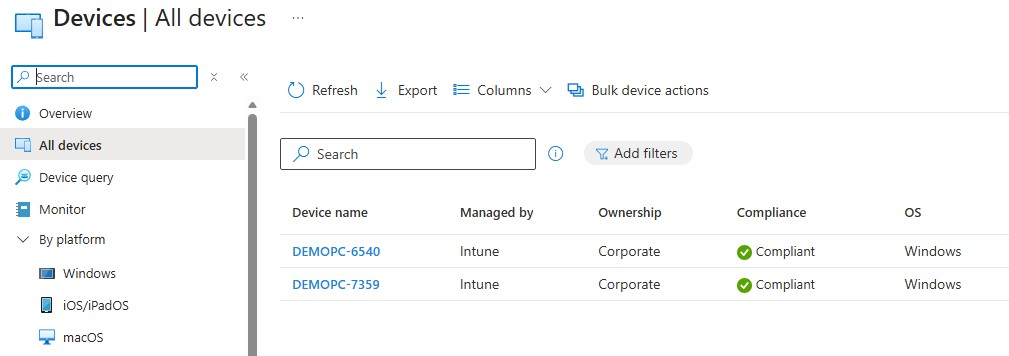
After activating the Toronto Read Only Role:
And after activating the Winnipeg Role:
And just to confirm, I will now try to reboot both devices using Intune. The Toronto device should fail since the user has Read Only access, while the Winnipeg device should reboot as Intune School Administrators are allowed to reboot devices.


It’s a pretty simple test, but it does the trick!